Note: Your service locations (delivery/shipping zones, pickup locations) are accessible to customers via https://shopName.com/locations. Use this so customers know exactly where you deliver and where you don't!
In this article, learn to create service locations for the regions your shop operates within:
- Set up a pick up location
- Set up a delivery zone
- Set up a shipping zone
To create a service location, visit Account > Service Location on your Freshline Dashboard.
Set up pickup location
Choose this for curbside or store pickup. Any customer that falls outside of your delivery or shipping zones will be defaulted to their nearest store pickup location. You can create as many pickup locations as you would like.
To add a pickup location:
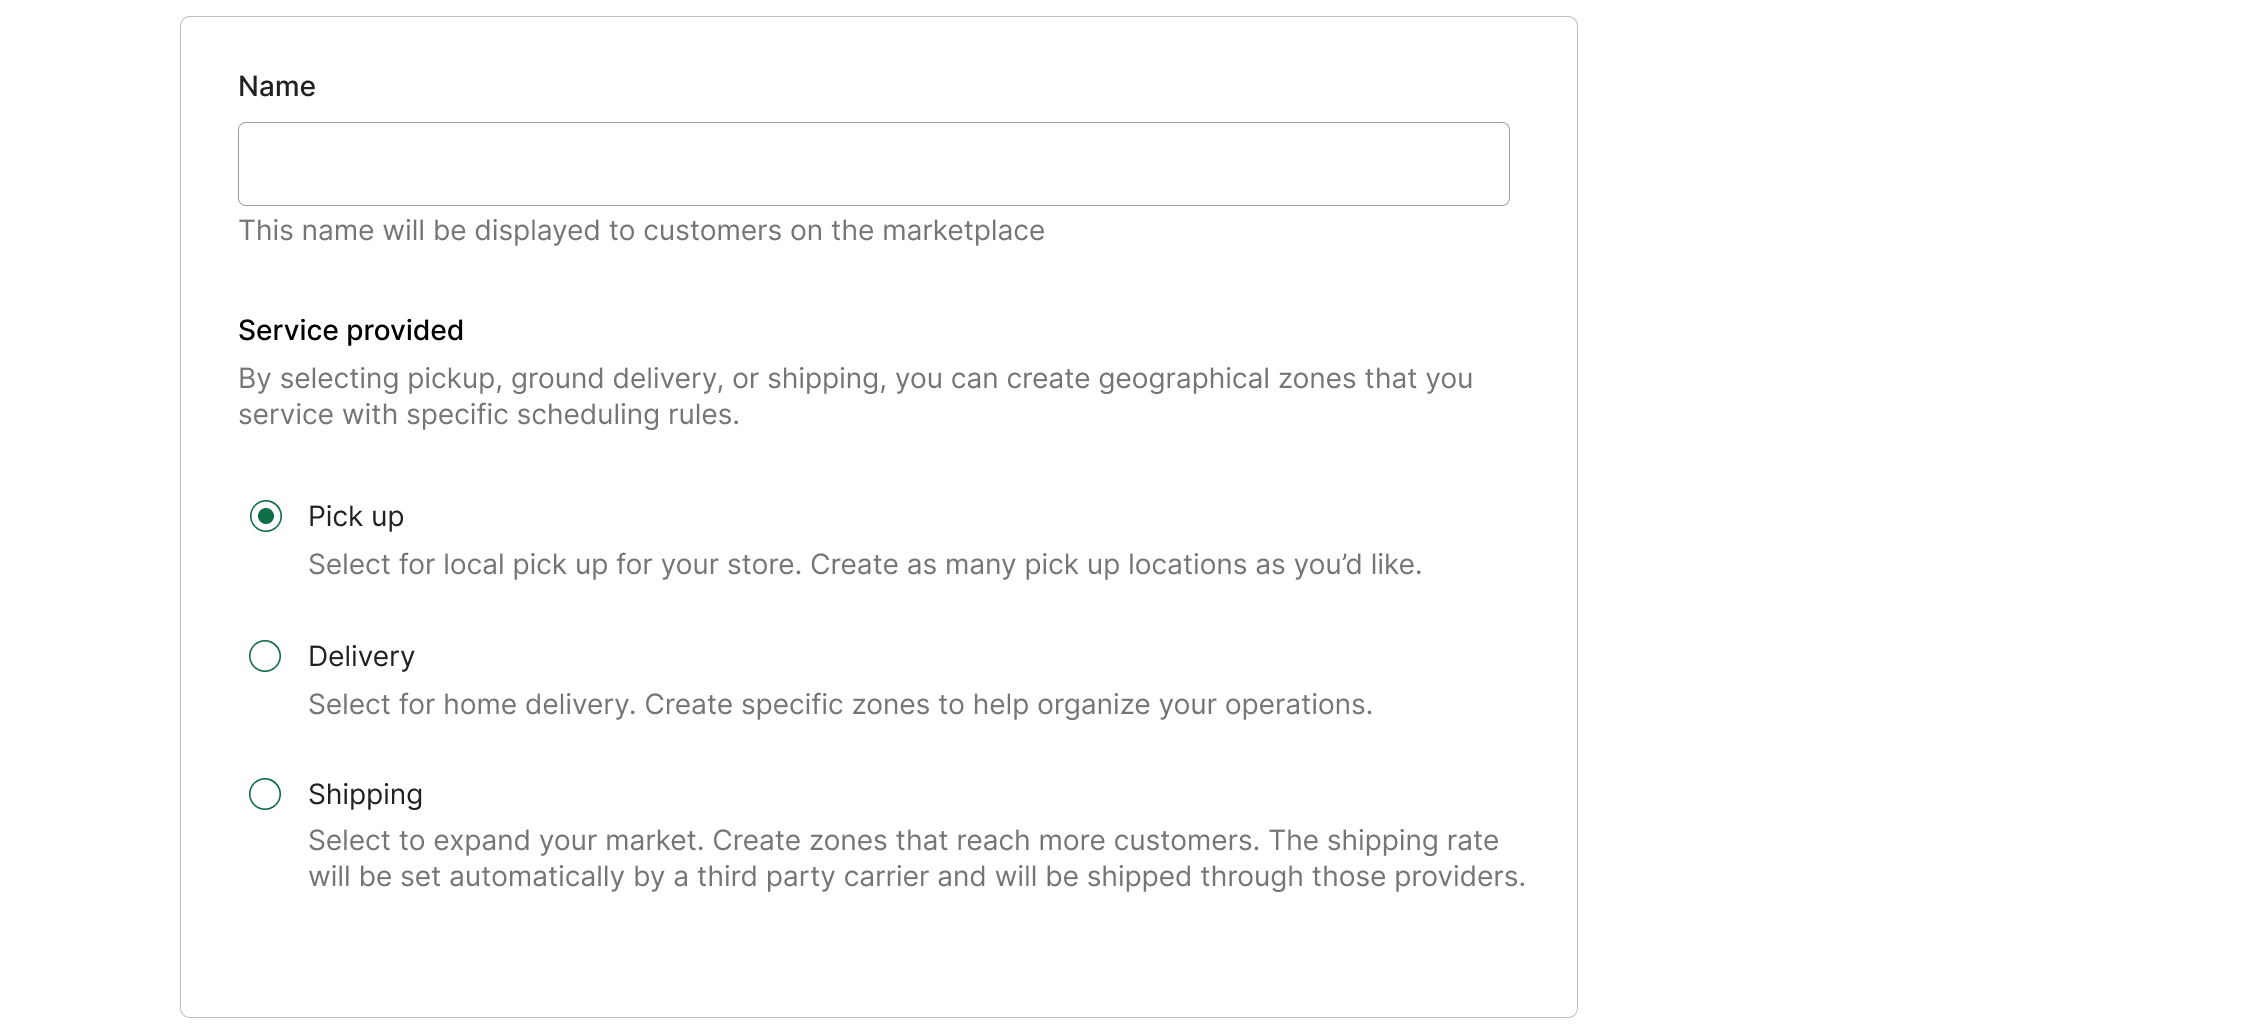
- Enter a name for your location.
- Select the pick up option as your service provided.
3. Enter the street address for the pickup location. Verify that the zip code, state, and city are correct.
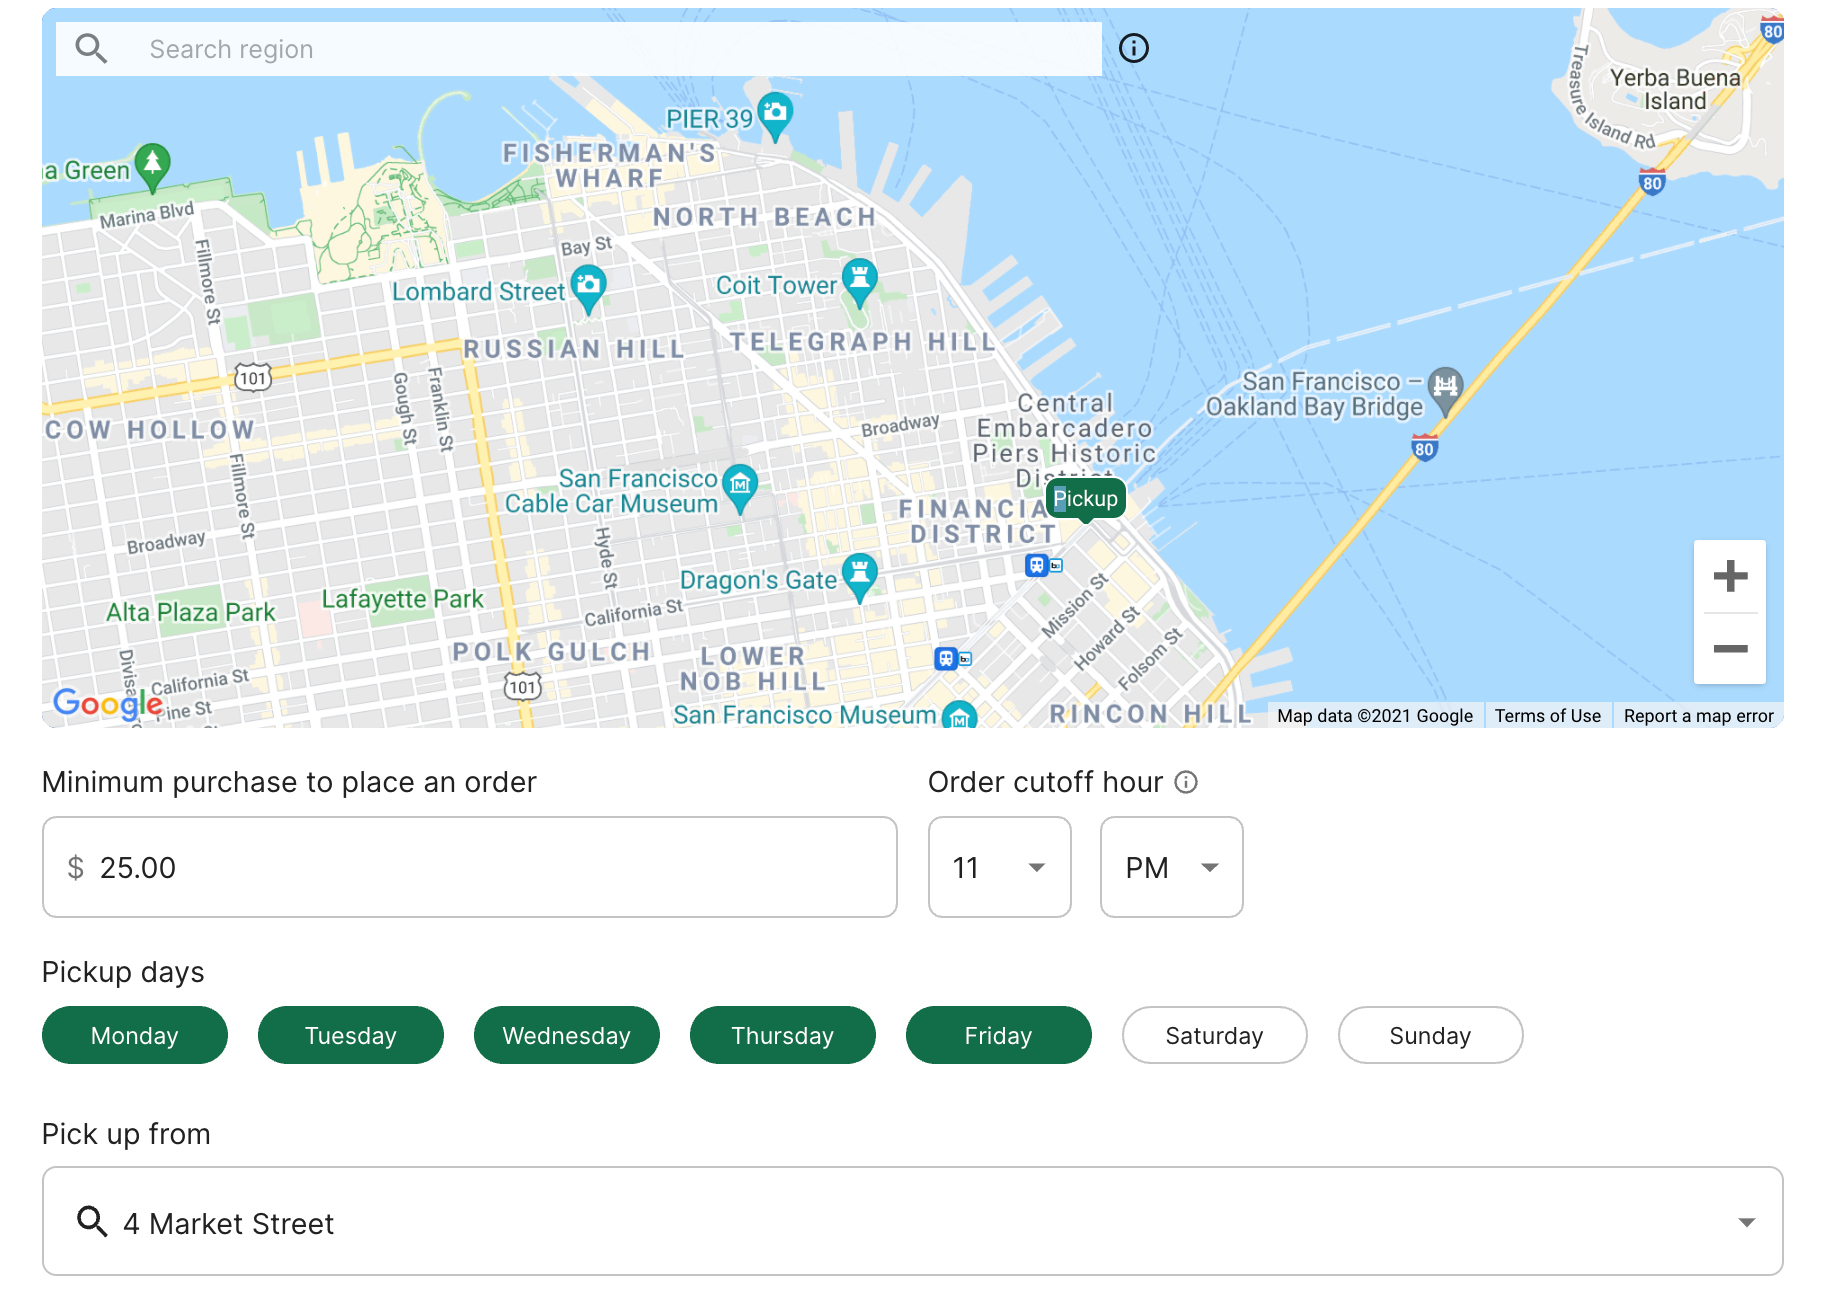
4. Set the minimum purchase amount to place an order.
5. Choose your available pickup day and order cutoff time for customers.
6. Optionally, create pickup instructions for your customers. This pickup address will now be available as an option during checkout.
7. Enable tipping for this service location to enable tips on checkout.

8. Optionally, choose a List of items unavailable for this location. Customers shopping in this location will not see these items, and will need to remove it from their cart to checkout.
9. When your pickup location is finalized, scroll up and click on Save.
Set up delivery zone
Choose this to set specific ordering rules and delivery dates based on a local geography. You can create as many zones as you would like (i.e. one per neighborhood).
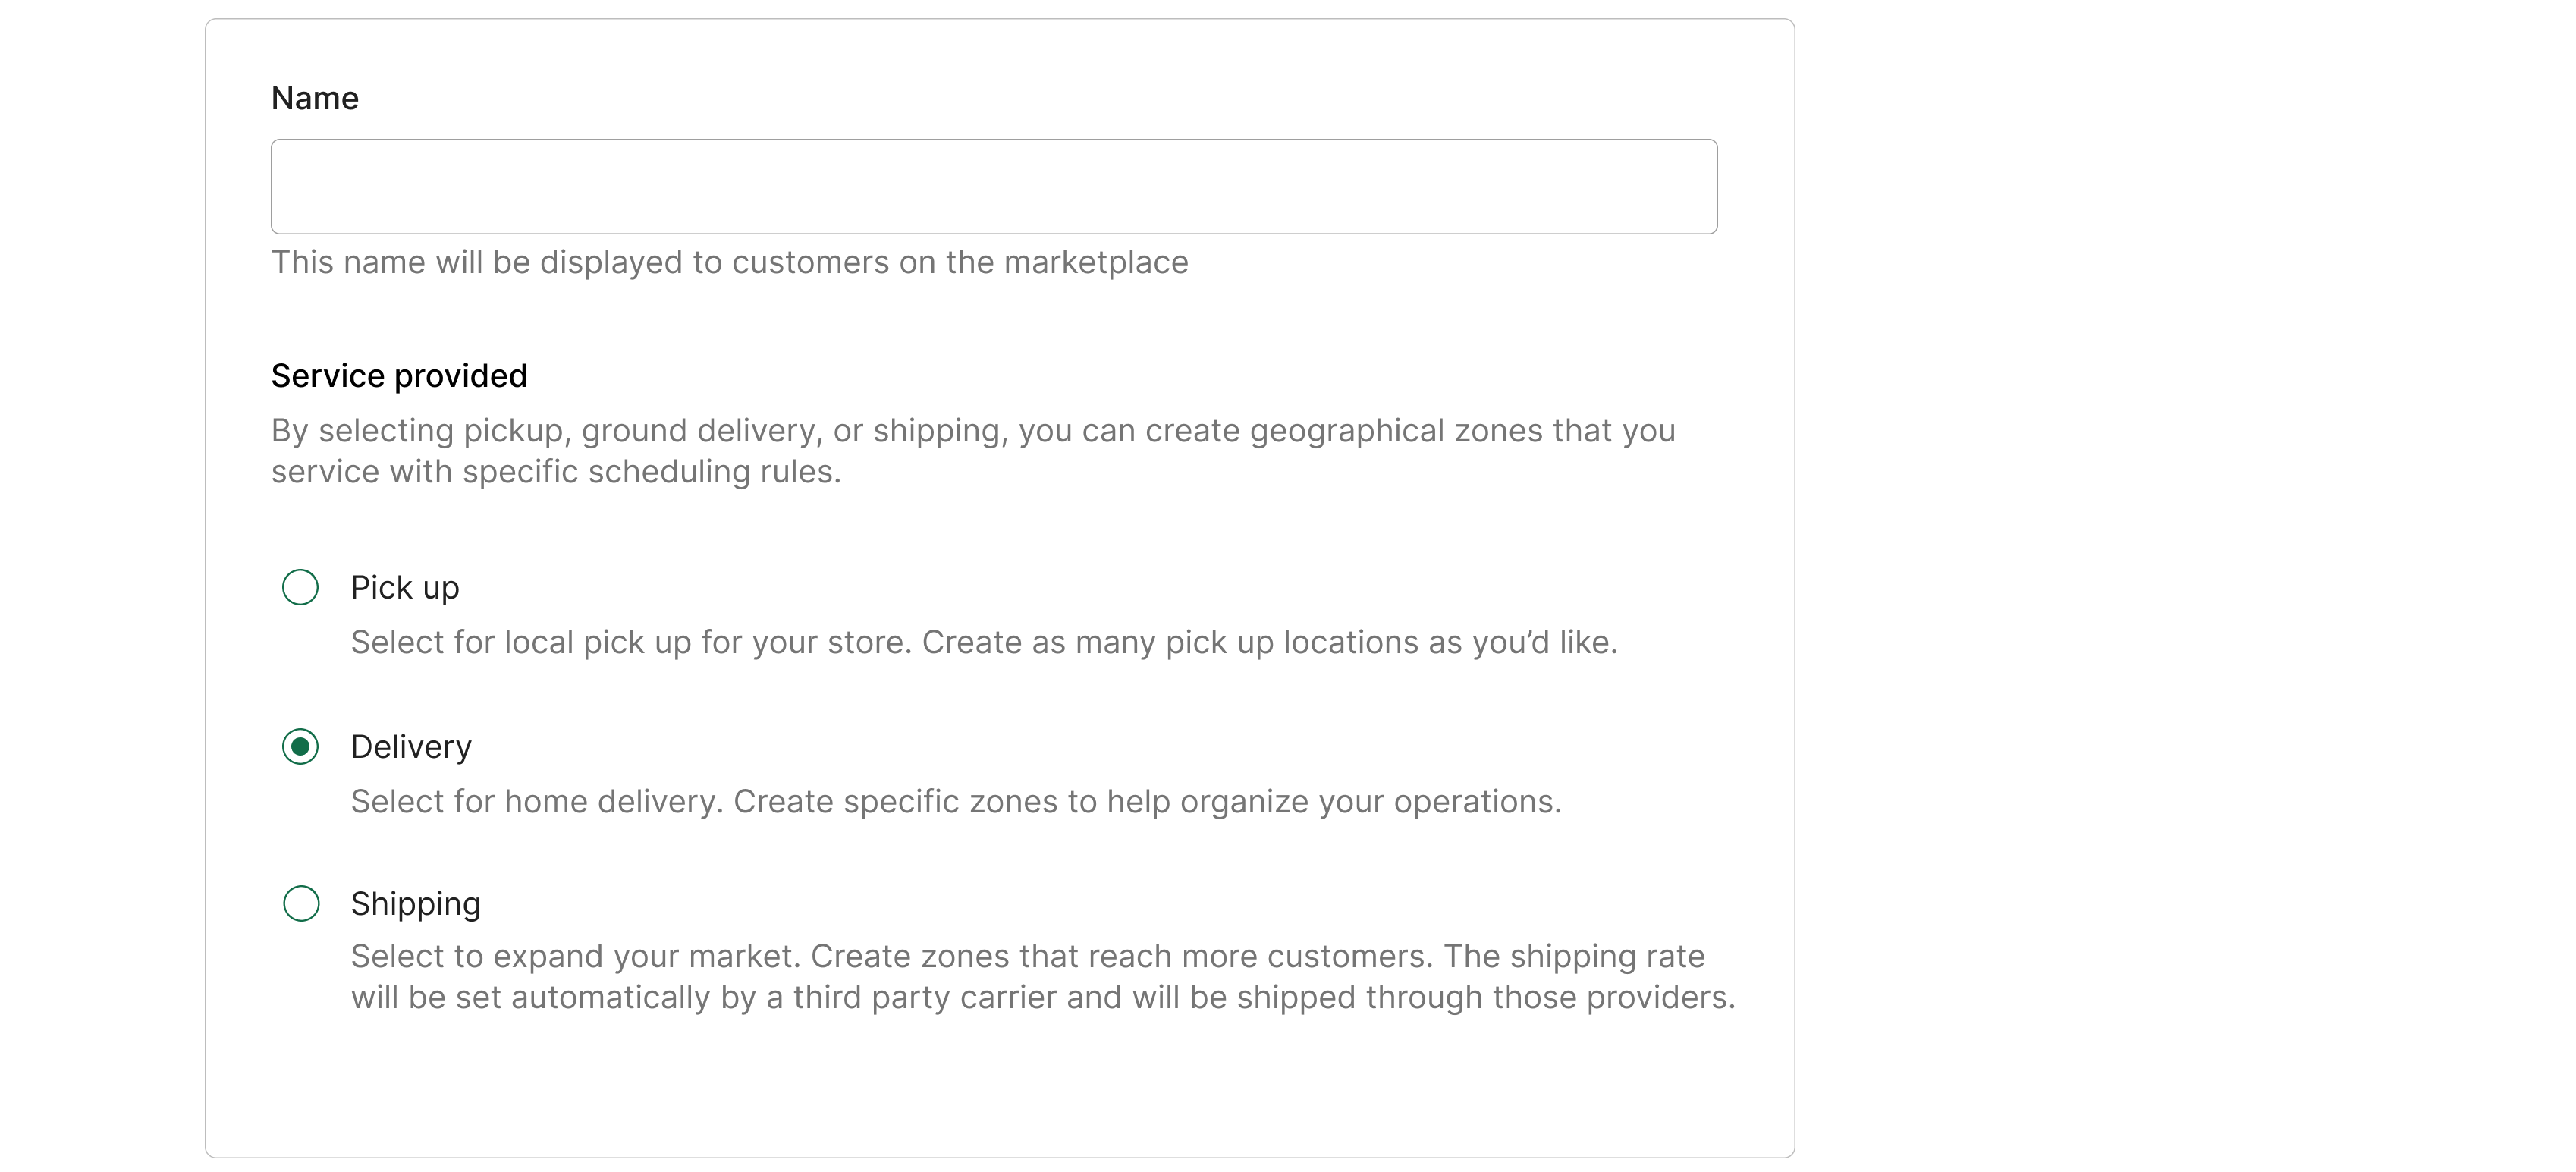
1. Enter a name for your zone.
2. Select the delivery option as your service provided.
3. Search for an area or use the map to zoom in or out onto a desired area. Click the polygon icon on the top right of the map view.

4. Draw a perimeter of the zone by clicking multiple points throughout the map, ensuring that the shape created is a closed shape.
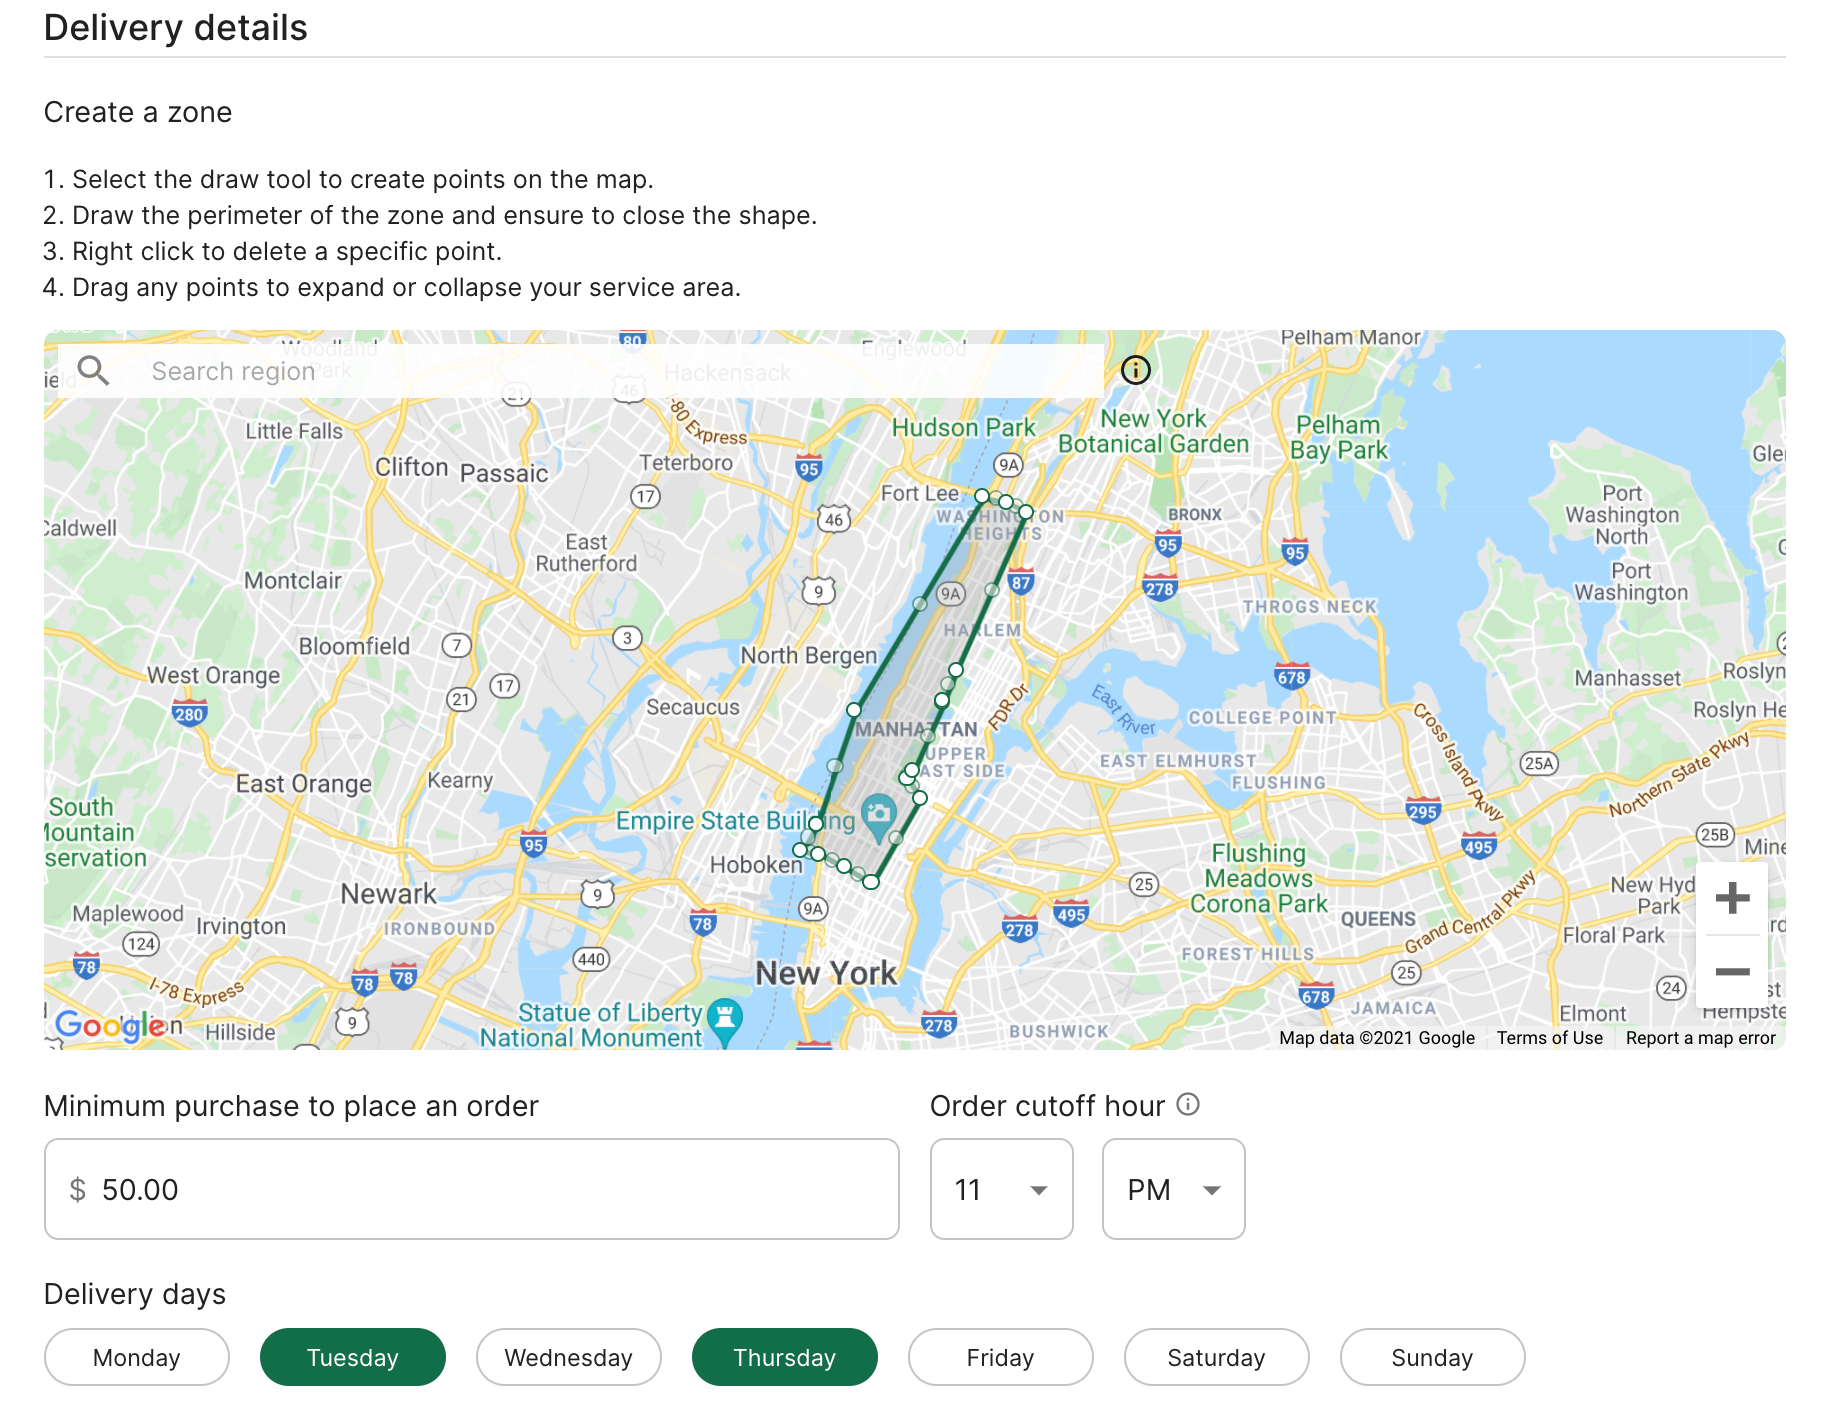
5. Set the minimum purchase to place an order.
6. Choose your delivery dates for the region. These will be the available choices to customers on checkout.
7. Set your order cutoff hour. Any orders placed after this time will be considered next day.
8. Optionally, enable tipping at checkout.
9. Optionally, choose a List of items unavailable for this location. Customers shopping in this location will not see these items, and will need to remove it from their cart to checkout.
10. When your delivery region is finalized, scroll up and click on Save.
Set up shipping zone
Choose this to enable third-party, carrier shipping. Please note, you must install the Freshline Shipping App under your Apps page to see this option.
1. Enter a name for your zone.
2. Select the shipping option as your service provided.

3. Search for an area or use the map to zoom in or out onto a desired area. Click the polygon icon on the top right of the map view.
4. Draw a perimeter of the zone by clicking multiple points throughout the map, ensuring that the shape created is a closed shape.

3. Set the minimum purchase to place an order.
4. Optionally set the minimum purchase for free delivery.
5. Choose your shipping dates for the region. This is the day the product will leave your warehouse. Customers will see an estimated arrival interval.
6. Set your order cutoff hours. Any orders placed after this time will be considered next day.
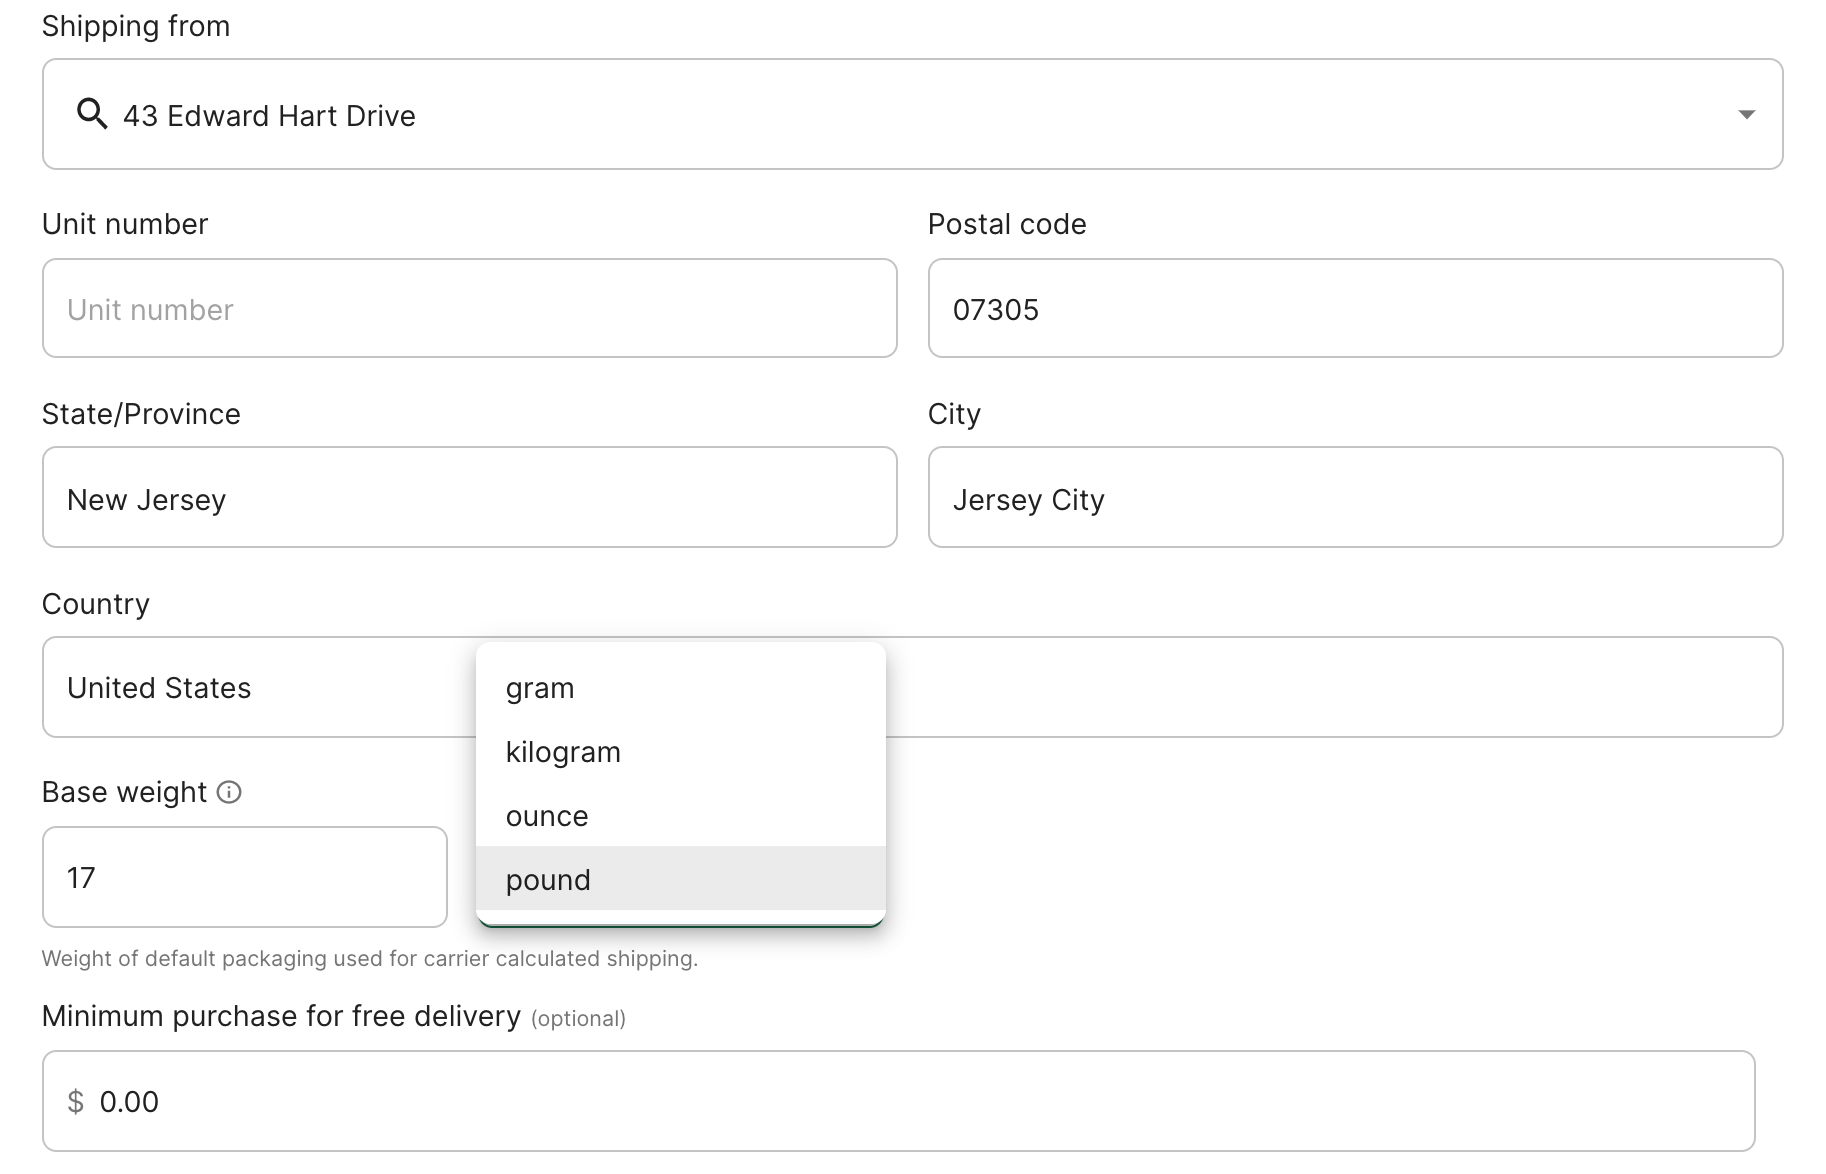
7. Set your shipping origin and base packaging weight. This will be used (alongside product shipping weights) to estimate your shipping fees on customer checkout.
8. Set your shipping origin and base packaging weight. This will be used (alongside product shipping weights) to estimate your shipping fees on customer checkout.
9. When your shipping details is finalized, scroll up and click on Save.