In this article, learn how to manage your orders by doing the following:
- View or Export orders
- Create manual orders
- Edit or adjust existing orders
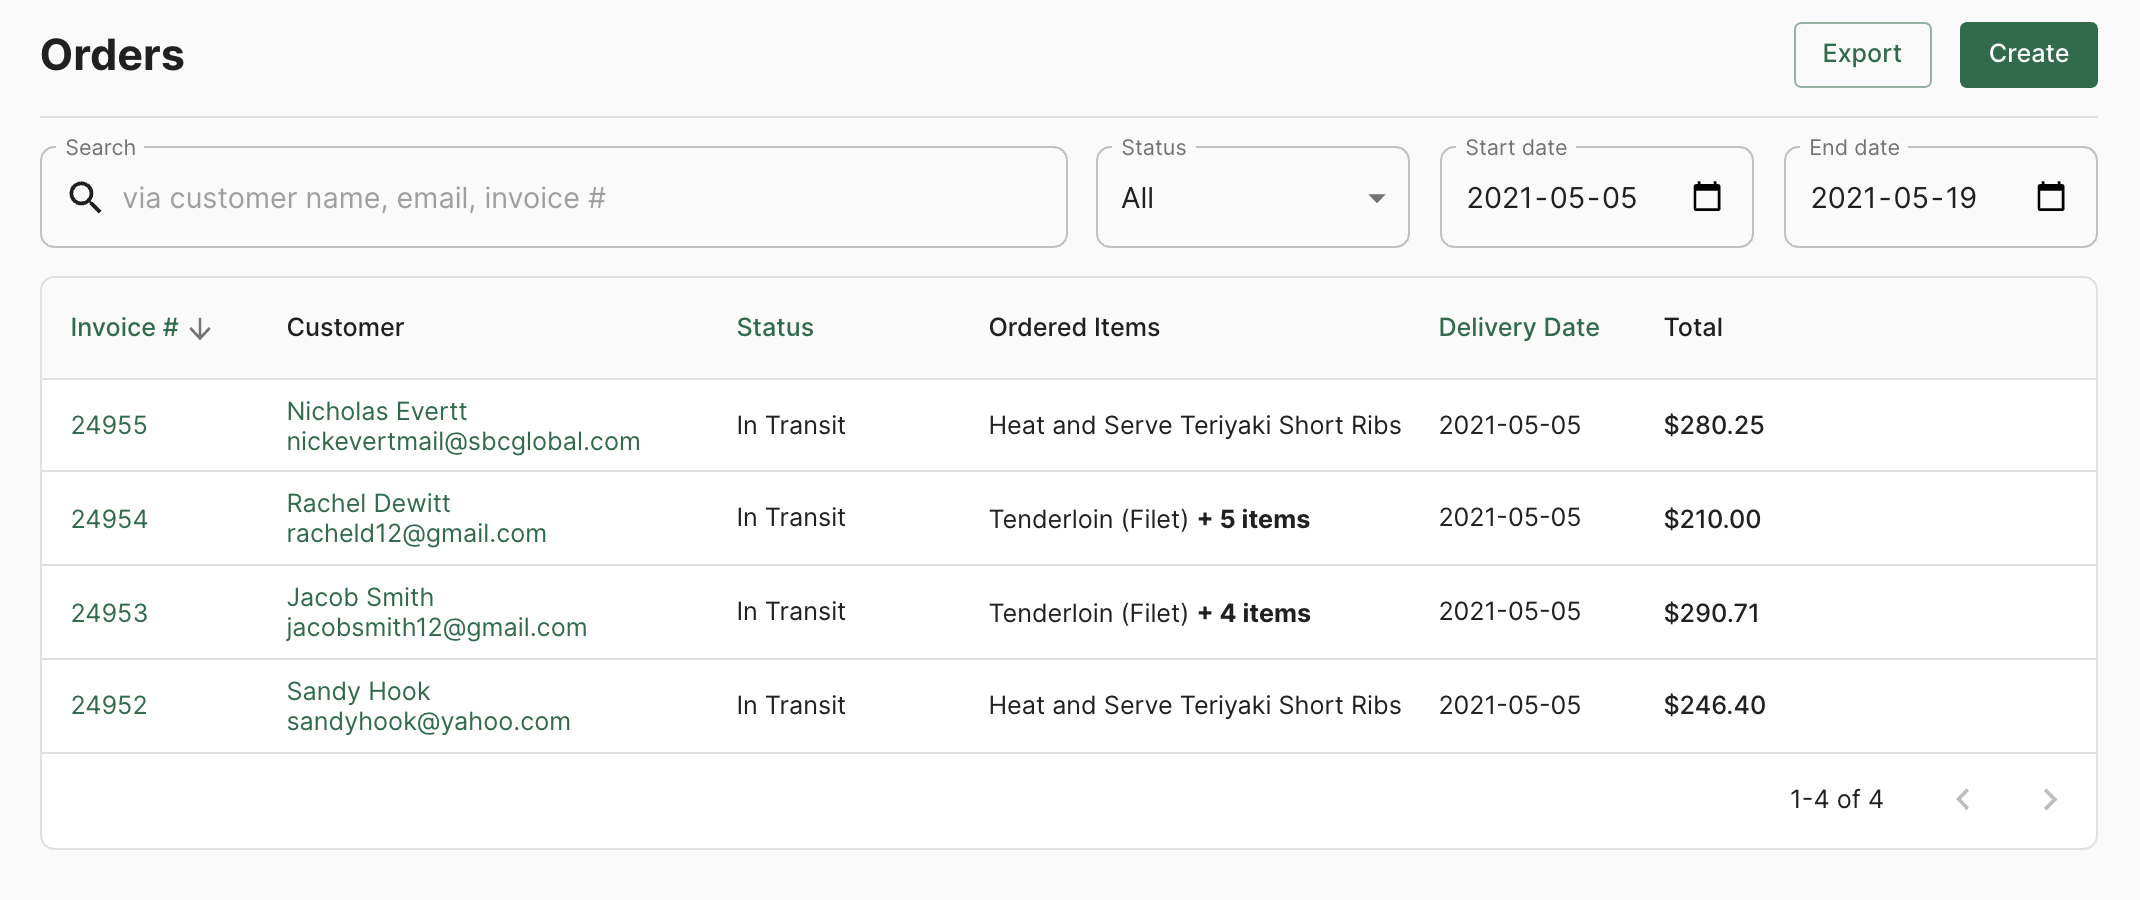
1 . View or export orders
To view your orders visit Orders on your Freshline Dashboard.
1. To filter by order status, use the Status dropdown.
2. To filter by date range, use the Start Date/End Date dropdown.
3. Optionally, click Export to generate a custom report of your orders.
2. Create an order
To view your orders visit Orders -> Create on your Freshline Dashboard.

1. Type in the customers’ name for the order in the Customer name input. They must have an existing account with a credit card on file for you to create an order for them.

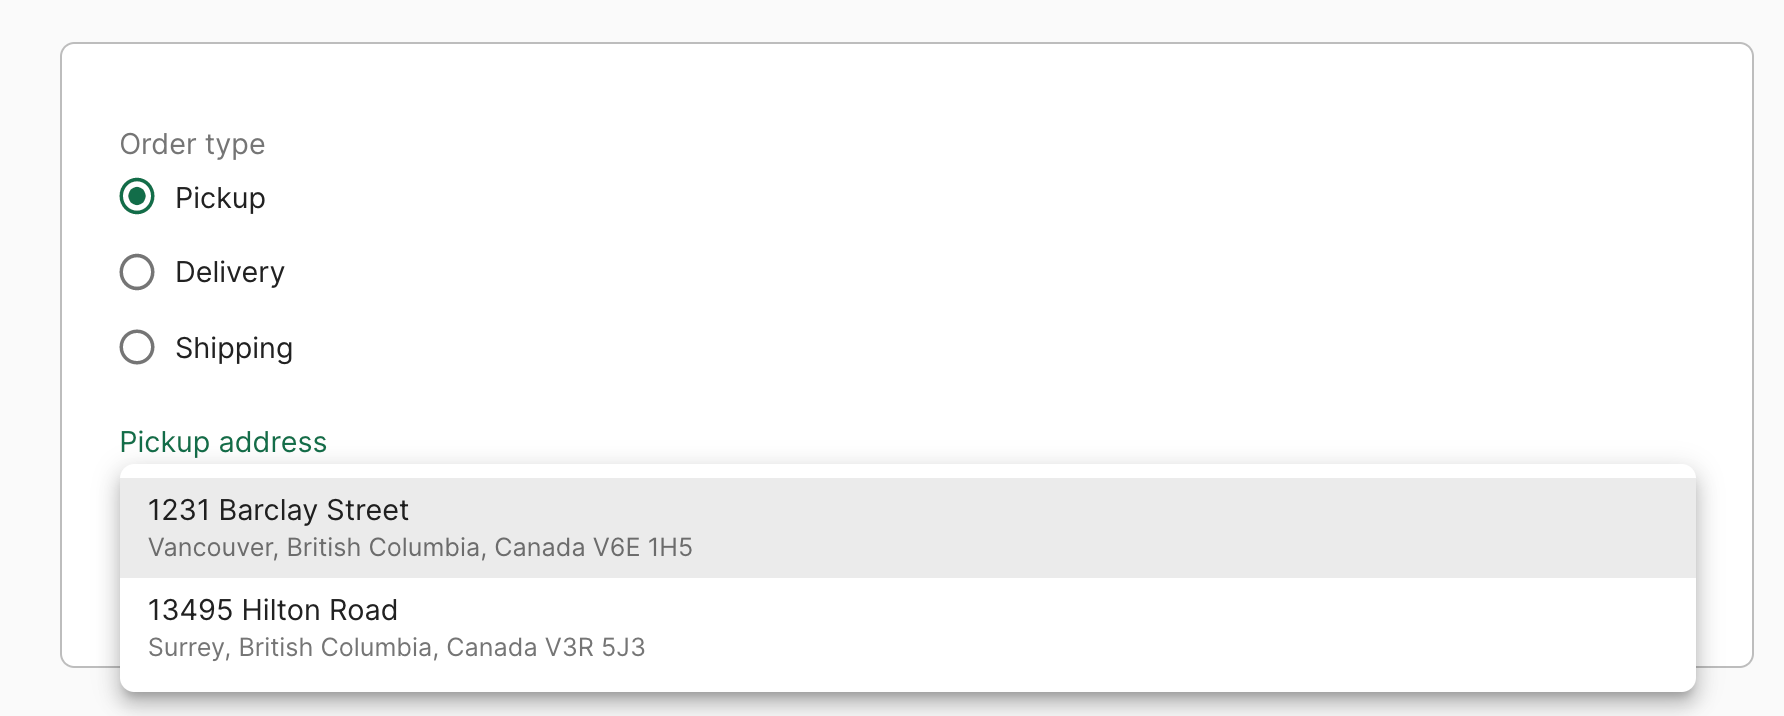
2. Select the order type of order - Delivery, Pickup, or Shipping. The system will pre-fill each field with the customer's details.
- Select the customer address or pickup address you would like to use for the order
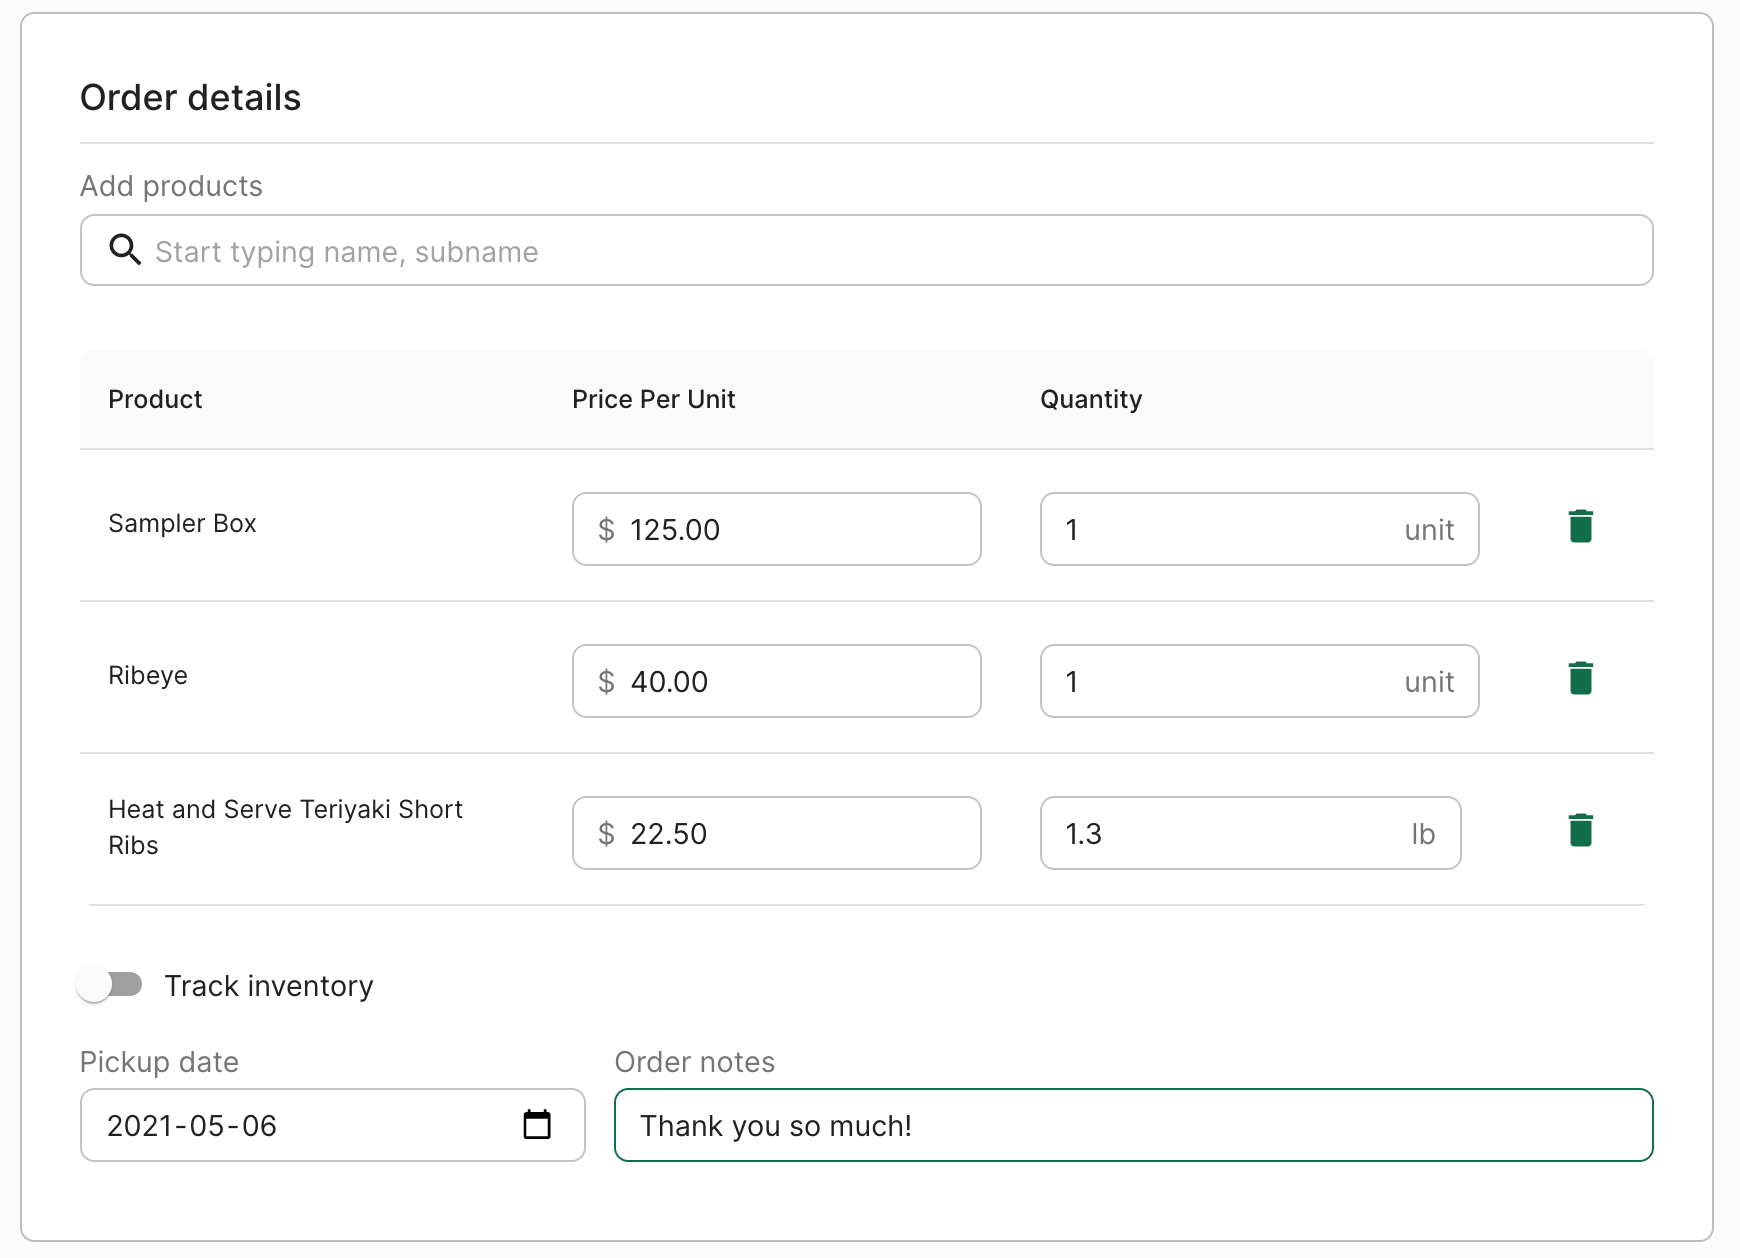
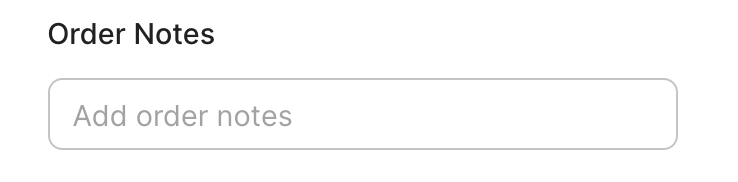
3. Type and choose the desired product(s) under the Order details section.
4. Adjust the price per unit, quantity, or delivery/pickup date as needed.
5. Optionally, toggle on Track inventory if you want to decrement your inventory on hand.
6. Select a delivery or pick up date and optionally add in associated order notes.
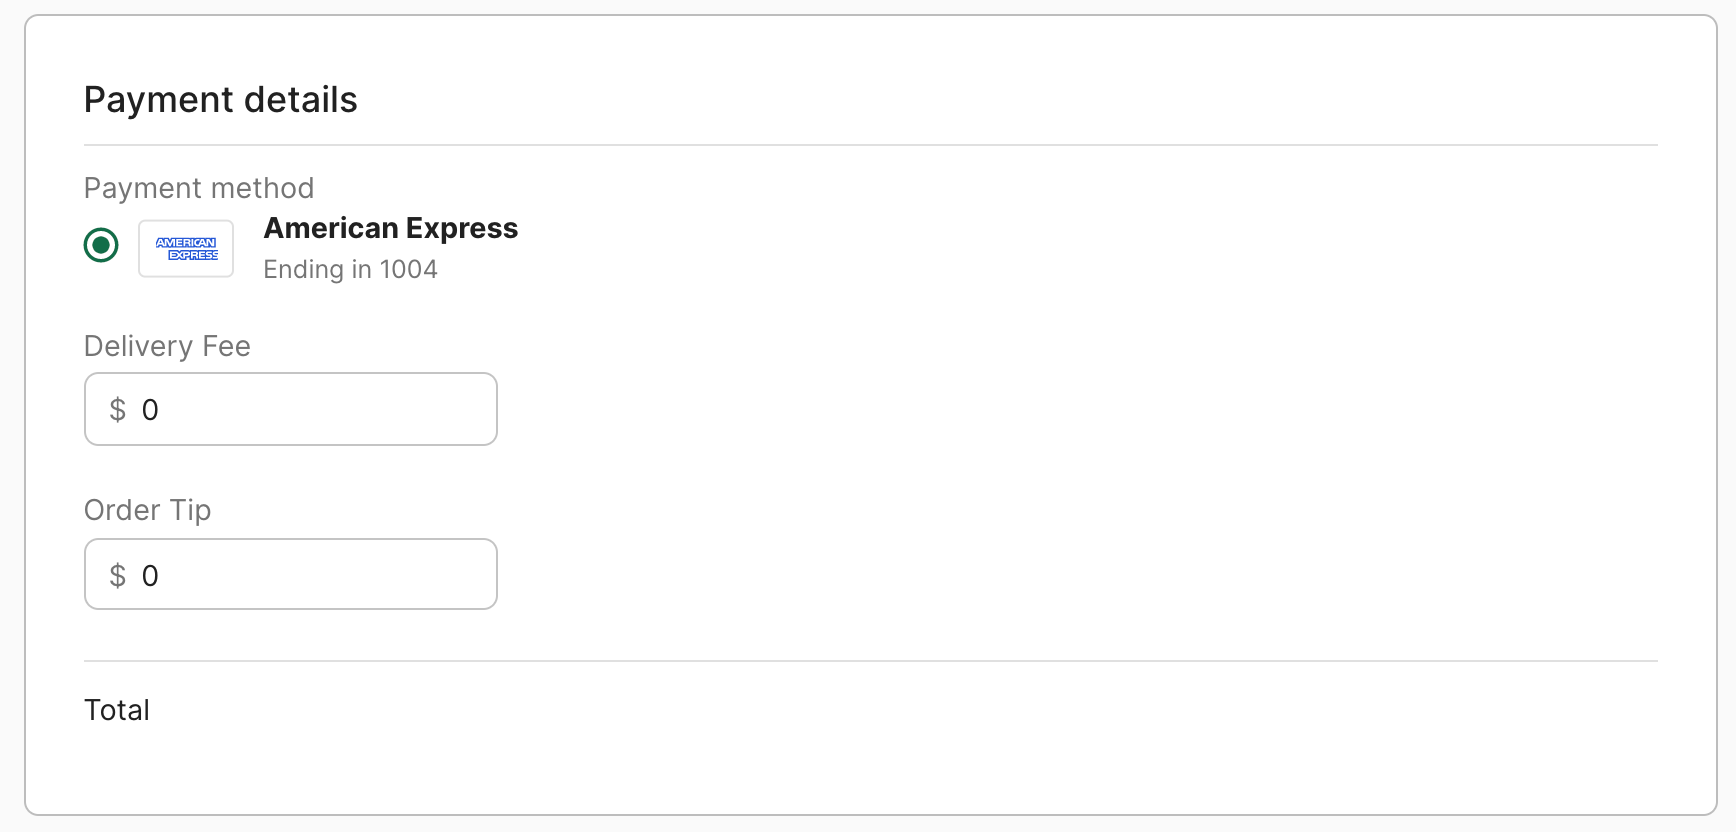
7. Select a payment method for the other.
8. Enter in any delivery fees or tip for the order, if applicable.
9. Once you have the order finalized, click Create at the top of the dashboard to complete the order. This order will now appear on your Orders or Operations pages.
3. Edit Or Adjust Existing Orders
To edit an order visit Orders > Search for an order > Click on the invoice number
1. Find the order in question by choosing a date range or searching on the orders page.
2. Click on the invoice number for the order you would like to adjust to view the order details for the order.
3. To change the order note, enter the new note in the Order Note input. The customer will be notified of this new note.
4. To change the delivery date, enter a new value using the Delivery date dropdown.

5. To refund an order, enter in a value for the Refund input. This input will only appear for paid orders. Customers will be auto-notified.
6. To adjust the quantity of the item, change the value of the Quantity input. Please note you can only change quantities up to the pre-authorized cap. To make additional changes, you must delete and order and create a manual order.
7. To remove an item, click the trash can icon next to a product.
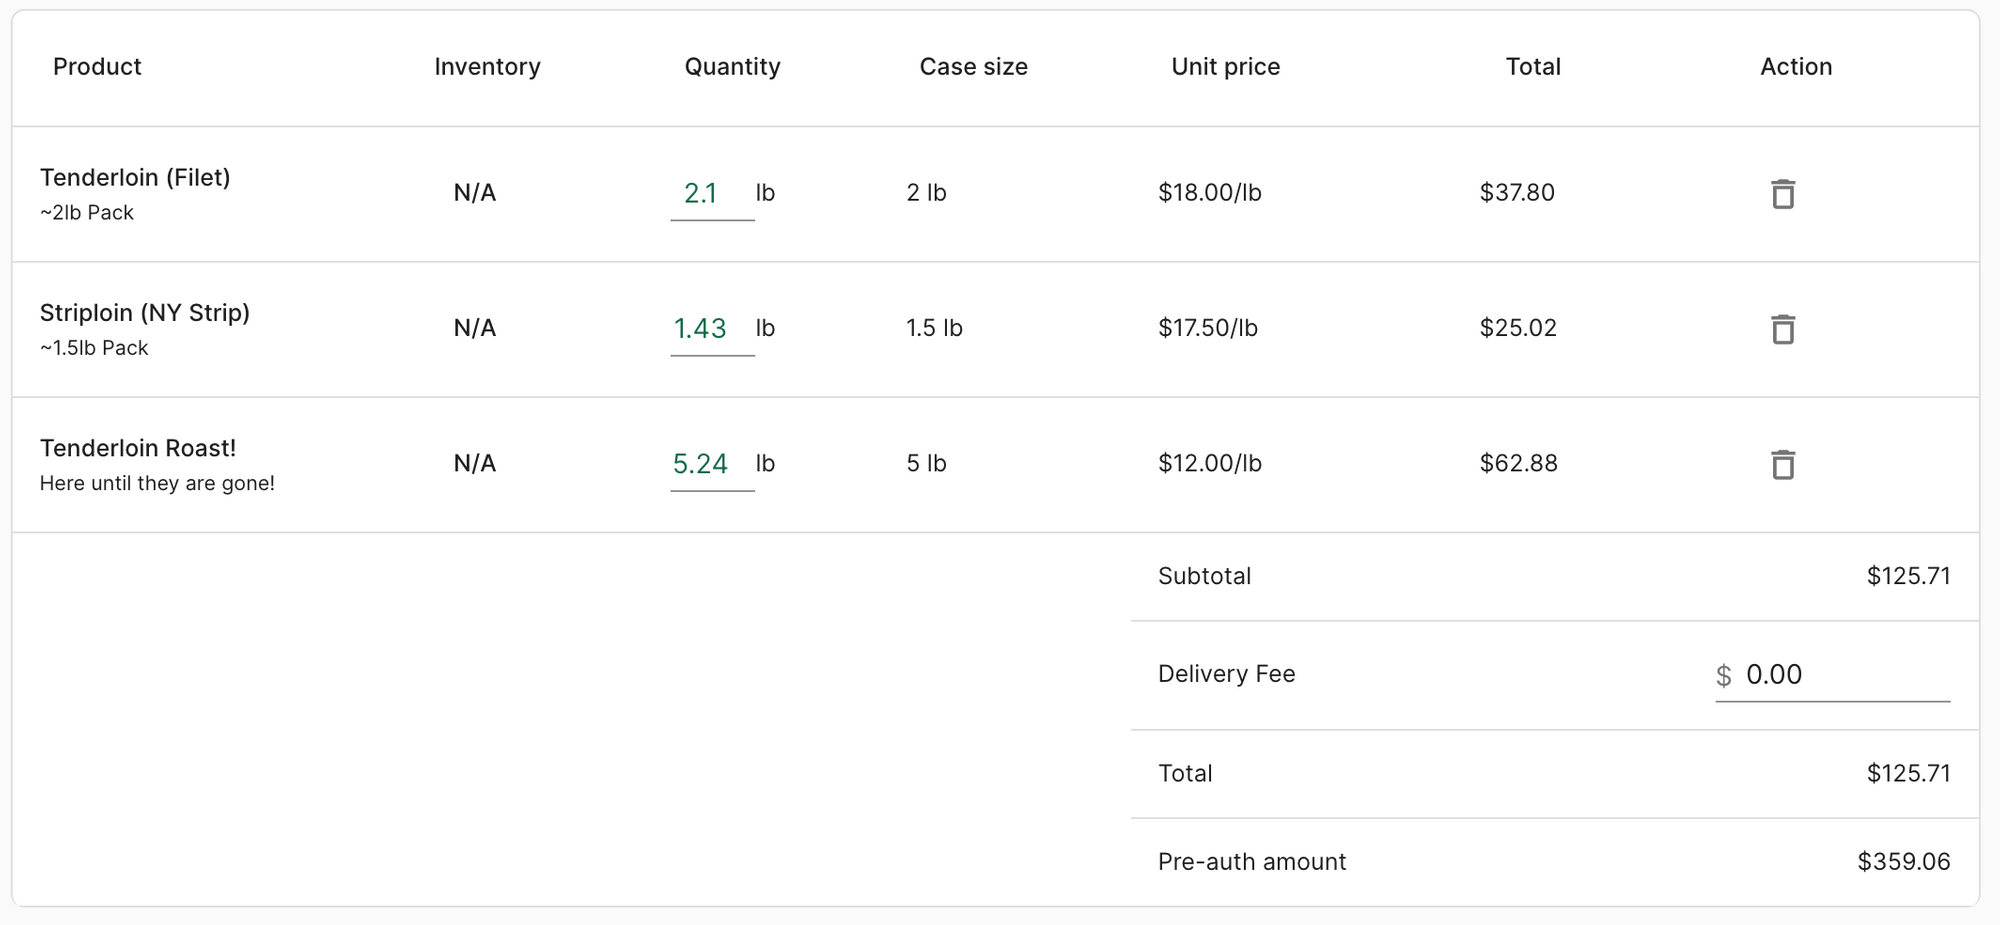
8. When all desired changes have been made, click Save at the top of the page.