The Operations page is your control center for knowing exactly what items need to be cut, packed, shipped, and what orders need to be fulfilled for a specific date. This is also the primary area where you can make variable weight adjustments to ordered items.
In this article, learn how to manage your operations with the following:
- View your order picklist and make weight adjustments
- Customize and export your order picklist report
- View your product picklist
1. View orders picklist and make weight adjustments
To view your order picklist visit Operations > Order Picklist on your Freshline Dashboard.
The order picklist is your TODO list of the orders that need to be packed and delivered for a specific date or zone. This is also where variable weight adjustments can be made.
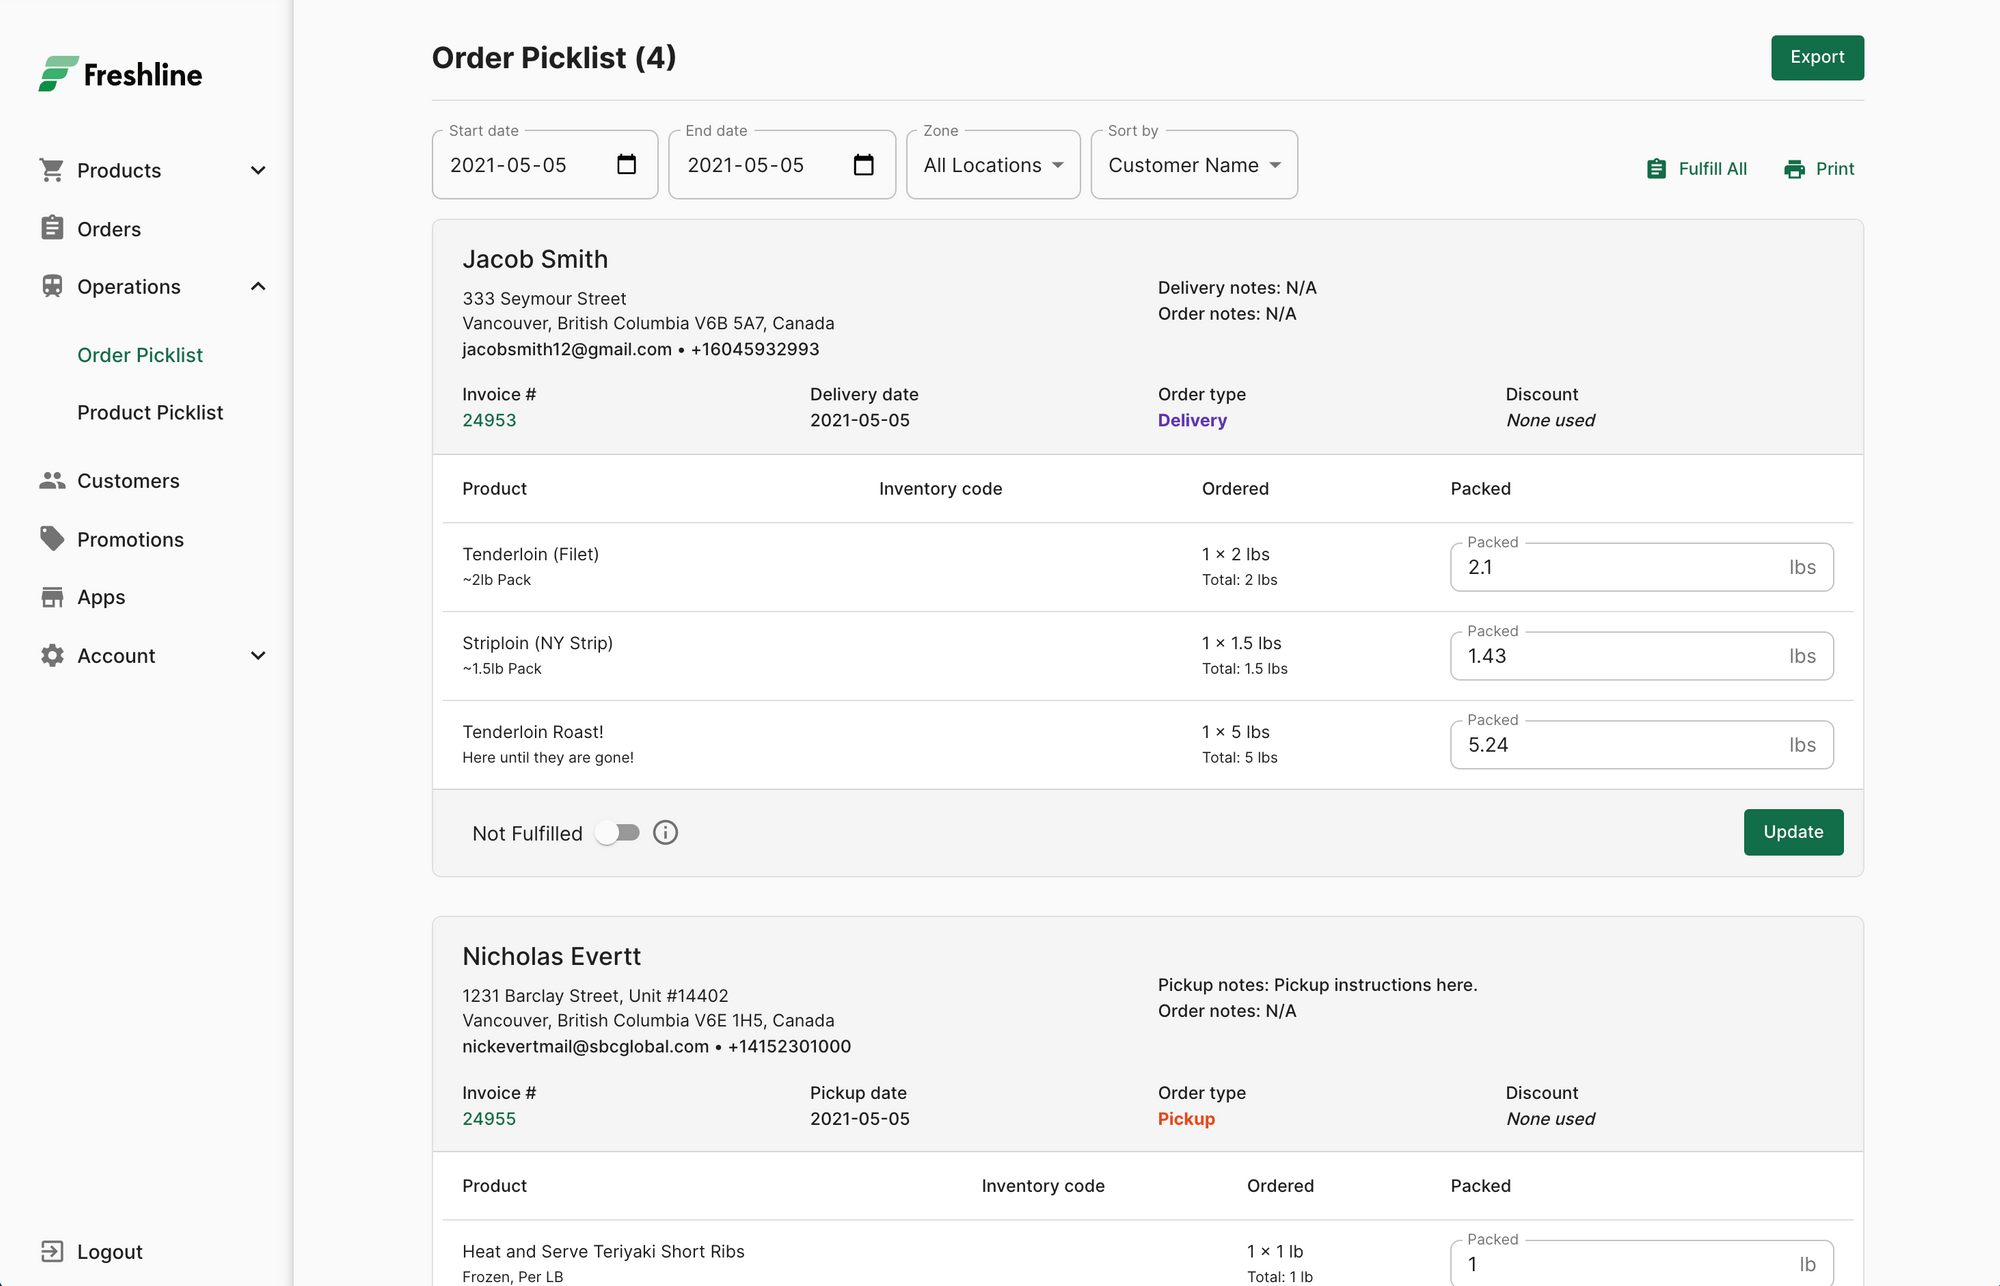
1. Use the Zone or Start/End Date dropdown to filter orders by specific delivery zones, pick up locations, shipping regions, and date ranges.
2. Use the Sort By dropdown to organize your list by pickup, delivery or discount code.
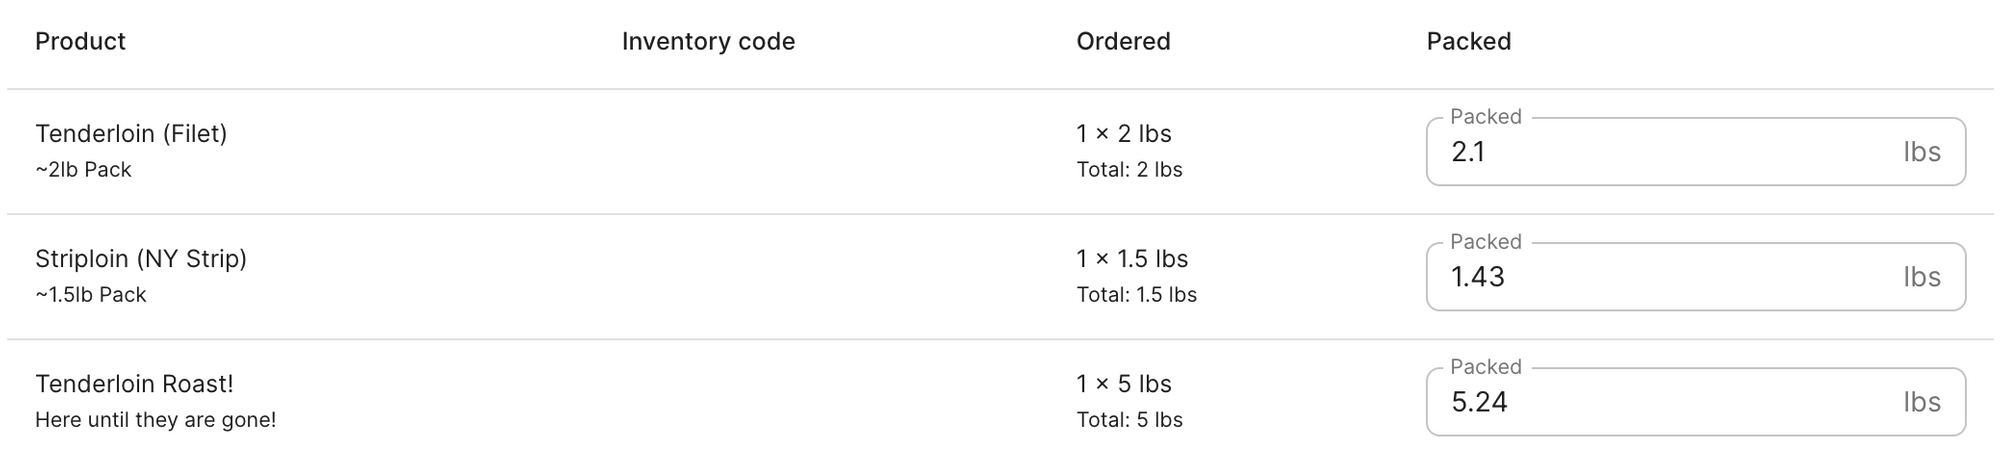
3. For each customer order, use the Packed column (only enabled for unpaid orders) to enter final product weights. For example, if the customer ordered 4 x 1lb steaks, enter “4.28” or “1.01 + 1.21 + 1.11 + 0.95”. Click Update to save your changes. Customers will be auto-notified of final weights.
4. Toggle Fulfilled on an individual item or Fulfill All to notify customers that their order is ready for pickup/delivery.
5. To get packing slips for your order picklist, click Print, which will display the order picklist in a printable, PDF format. Each order will occupy one page for each attachment to shipping boxes.

6. To further customize the fields, columns, and layout of your picklist via Excel, click on Export.
2. Customize and export your picklist report
To further customize the fields, columns, and layout of your picklist via Excel, click on Export on the Order Picklist page.
1. Select all the columns you would like to appear in your picklist sheet under Select.
2. Drag to rearrange the order in which you’d like the columns to appear in your sheet under Order.
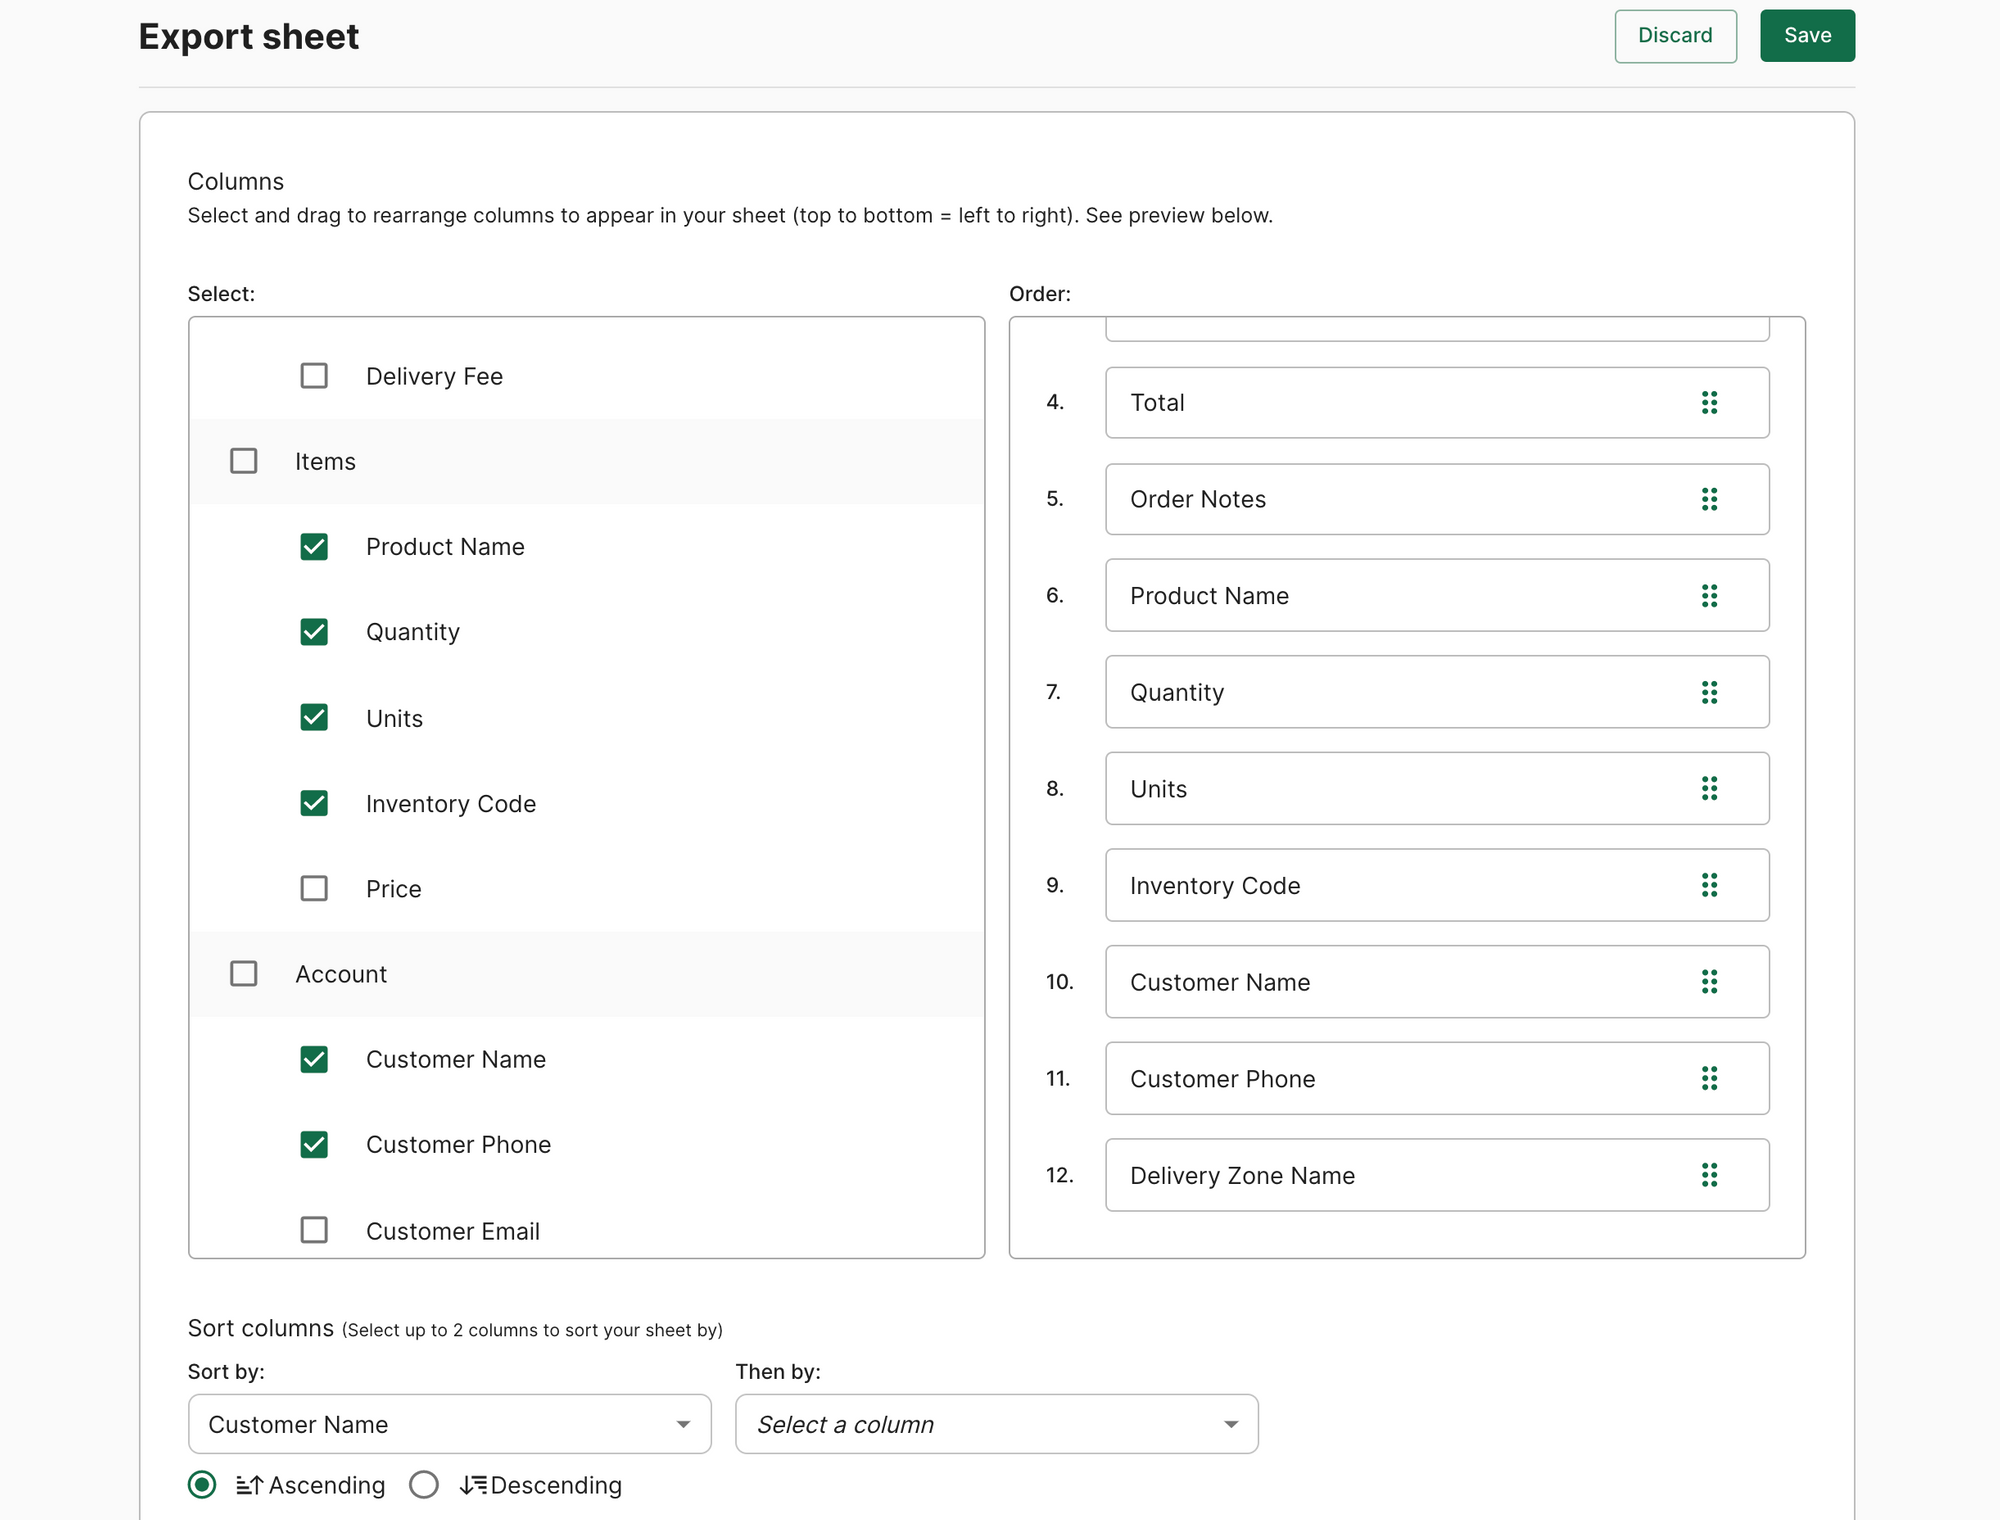
3. Select how you’d like your columns to be sorted using the drop down. Once you select the columns you’d like your sheet to be sorted by, select ascending or descending for each.
4. Use the preview table to get a better idea of how your sheet will be organized. Note: This preview is based on sample data but showcases how your columns will be organized, sorted, and grouped in your picklist.

6. When you have your picklist sheet finalized, click Save and Generate. You'll receive a copy of the report via email.
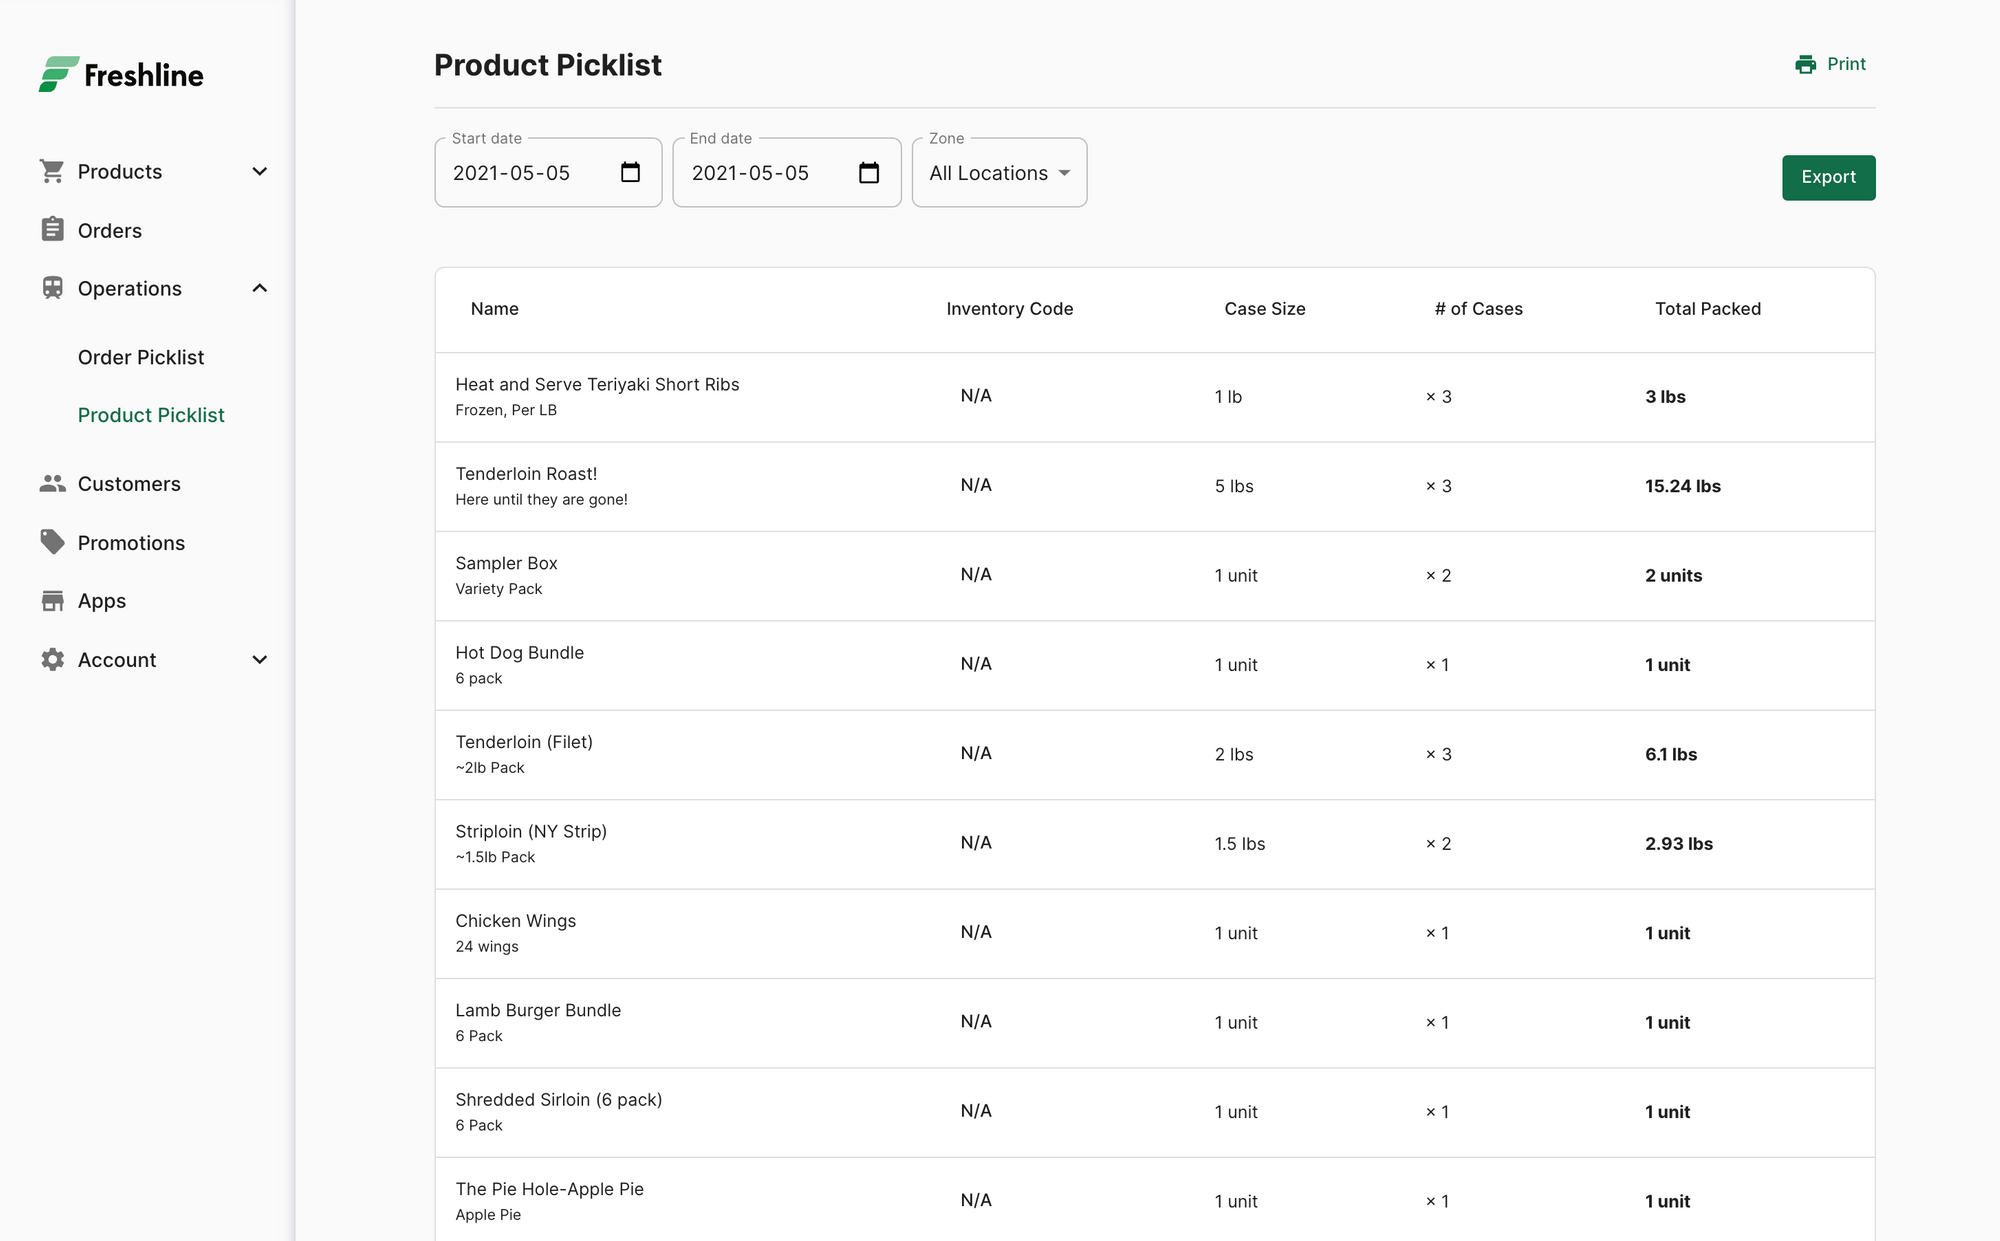
3. View product picklist
To view your order picklist visit Operations > Product Picklist on your Freshline Dashboard.
The product picklist is your TODO list of the aggregate products that need to be packed and delivered for a specific date or zone.
1. Use the Zone or Date dropdown to filter the list by specific delivery areas, or pick up locations, or shipping regions.
2. View the table of aggregate products that need to be cut, packed, and delivered across all of the individual orders for a given date range or zone.
2. Optionally, click Export to view the picklist as a spreadsheet or Print for PDF format.